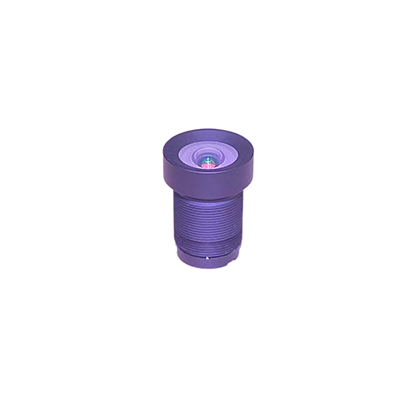
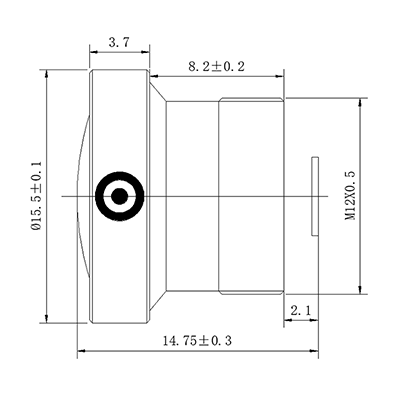
Low distortion M12 S-mount board lens
09/02/2025
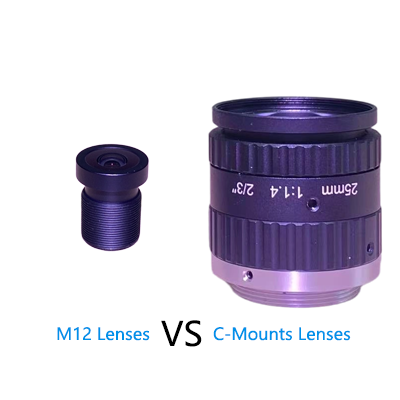
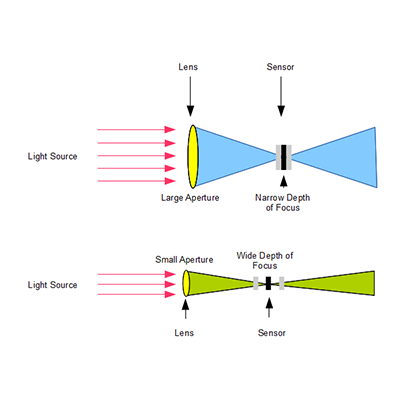
How Do CCTV Lenses Work?
09/03/2025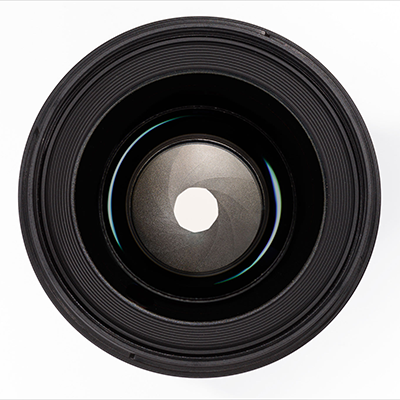
Low-light photography presents a thrilling yet daunting challenge for photographers. Whether capturing cityscapes at dusk, starry skies, or intimate indoor moments, the struggle to balance exposure, sharpness, and noise is real.
1. Choose the Widest Possible Aperture (But Be Cautious)
The first rule of low-light photography is simple: let in as much light as possible. This means setting your aperture to its widest (lowest f-number) setting. For example, a lens with an f/1.4 or f/2.8 aperture will gather significantly more light than one capped at f/5.6.
- Why it matters: A wider aperture reduces the need for slower shutter speeds or higher ISO settings, minimizing motion blur and digital noise.
- The catch: Ultra-wide apertures (e.g., f/1.2–f/1.8) have a shallow depth of field, meaning only a tiny portion of your image will be in focus. This is ideal for portraits or isolated subjects but risky for landscapes or group shots.
- Pro tip: Test your lens’s sweet spot. Many lenses perform best (sharpest) at f/2.8 to f/4, even if they open wider. Use a tripod and experiment to find the balance between light intake and sharpness.
Optimal Aperture for Sharpness
2. Pair Aperture with Shutter Speed and ISO Wisely
Aperture doesn’t work in isolation. To avoid overexposing or underexposing your shot, adjust your shutter speed and ISO in tandem.
- Shutter speed: In low light, slower speeds (e.g., 1/30s or longer) are often necessary. However, anything below 1/60s risks camera shake, even with image stabilization. Use a tripod for stability.
- ISO: Higher ISO values (e.g., 1600–6400) amplify light but introduce grain. Modern cameras handle noise better than older models, but keep ISO as low as possible.
Example workflow:
- Set aperture to f/2.8.
- Adjust shutter speed to 1/125s (if handheld) or 2–5 seconds (with a tripod).
- Increase ISO only if the image is still too dark.
For more guidance, check out this comprehensive guide to the exposure triangle by Photography Life.
3. Use Aperture Priority Mode (A or Av) for Control
Manual mode isn’t always practical in fast-paced low-light scenarios. Aperture Priority mode lets you set the f-number while the camera automatically adjusts shutter speed.
When to use it:
- Street photography at night.
- Events with fluctuating lighting (e.g., concerts, weddings).
- Situations where you need to react quickly.
How to optimize it:
- Enable exposure compensation to brighten or darken images as needed.
- Monitor shutter speed to avoid blur. If it dips below 1/60s, switch to a tripod or raise ISO.
4. Leverage Depth of Field for Creative Effects
Aperture isn’t just about light—it’s a storytelling tool. In low-light conditions, a shallow depth of field (wide aperture) can isolate subjects with dreamy bokeh, while a narrow aperture (e.g., f/11) keeps more of the scene sharp.
Examples:
- Portraits: Use f/1.8 to blur busy backgrounds and focus on faces.
- Landscapes: Stop down to f/8–f/16 to ensure foreground-to-background clarity.
- Astrophotography: A wide aperture (f/2.8 or lower) captures more stars, but focus manually at infinity for crisp results.

lens aperture
5. Avoid Common Aperture Pitfalls in Low Light
Even seasoned photographers make mistakes. Here’s how to sidestep them:
- Dirty lenses: A speck of dust at wide apertures becomes a glaring blemish. Clean your lens before shooting.
- Over-reliance on autofocus: In dim light, autofocus may hunt or miss. Switch to manual focus or use back-button focusing.
- Ignoring diffraction: At very narrow apertures (e.g., f/22), light waves bend, reducing sharpness. Stick to f/8–f/16 for landscapes.
- Bonus Tip: Use a fast prime lens. Zoom lenses often max out at f/4 or f/5.6, while primes like a 50mm f/1.8 are affordable and excellent for low light.
Final Thoughts
Low-light photography aperture tips aren’t just about technical settings—they’re about creativity and problem-solving. By mastering aperture’s role in exposure, depth of field, and image quality, you’ll turn dark, challenging scenes into opportunities for breathtaking artistry.