
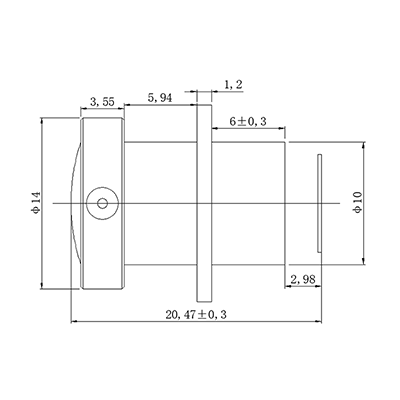
Automotive side mirror lens
11/26/2025
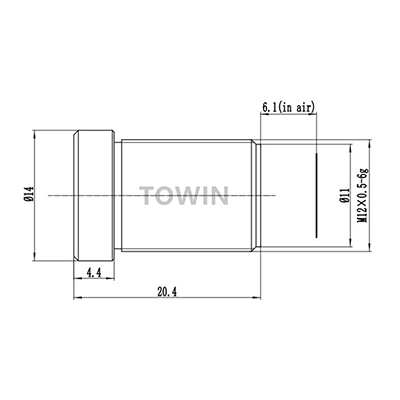
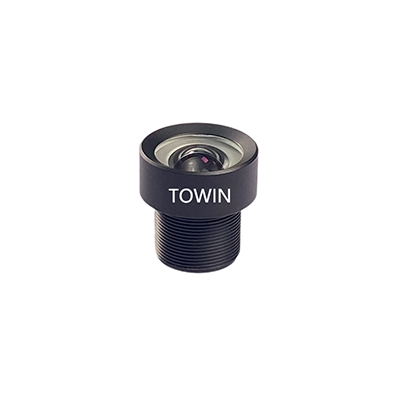
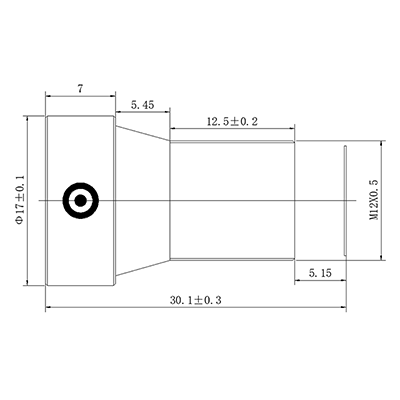
Compact CS-Mount lenses for embedded systems
11/26/2025Lens distortion can significantly impact the quality of your photos, leading to warping or other unwanted effects. If you’re serious about photography, whether for professional work or personal enjoyment, understanding how to minimize lens distortion is crucial. Using a Low Distortion Lens can go a long way in improving the quality of your images and providing clarity, sharpness, and accuracy.
What is Lens Distortion and Why Does It Happen?
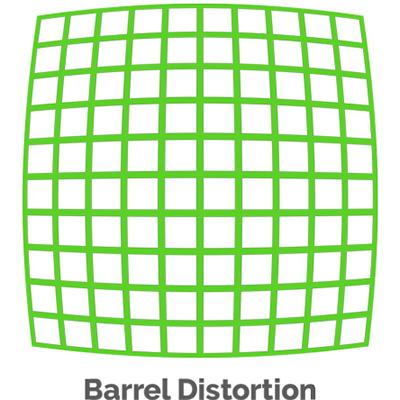
Lens distortion occurs when a camera lens causes straight lines in an image to appear curved or bent. This issue can arise due to various factors, including the type of lens used, the aperture settings, and the focal length. Common forms of lens distortion include barrel distortion, pincushion distortion, and chromatic aberration.
Barrel distortion makes straight lines appear bowed outward, typically noticeable at the edges of wide-angle shots. Pincushion distortion, on the other hand, makes straight lines appear to curve inward, often seen in telephoto lenses. Chromatic aberration results in color fringing, where colors appear to spill outside edges, usually caused by cheap lenses or extreme aperture settings.
To tackle lens distortion effectively, it’s essential to understand its causes and learn how to minimize its impact. Here’s how you can do that.
6mm Low Distortion Industrial Lens
How to Minimize Lens Distortion with the Right Gear
1. Use a Low Distortion Lens
Investing in a Low Distortion Lens is one of the most effective ways to minimize lens distortion. These lenses are specially designed to reduce the bending and warping that is common with standard lenses. Whether you choose a prime lens or a wide-angle lens, look for models specifically labeled as “low distortion.” These lenses typically use special glass elements and advanced optical designs to provide clearer images.
2. Choose the Right Focal Length
Wide-angle lenses are more prone to distortion, especially barrel distortion. To minimize this effect, choose lenses with a moderate focal length. Lenses in the range of 35mm to 50mm (on a full-frame camera) tend to produce less distortion compared to ultra-wide lenses. If you’re capturing landscapes, try using a Low Distortion Lens in this focal range for better results.
3. Stay Away from Extreme Apertures
Shooting at very wide or very narrow apertures can sometimes exacerbate lens distortion. For the sharpest results with minimal distortion, aim to shoot at moderate apertures like f/8 or f/11. These settings allow for better depth of field and reduce the risk of optical anomalies that can distort your images.
How to Minimize Lens Distortion in Post-Processing
While using the right lens and settings is the best way to minimize lens distortion, there are also post-processing techniques you can use to fix distortion issues after the photo is taken.
1. Use Lens Correction Profiles
Most image editing software, like Adobe Lightroom or Photoshop, comes with built-in lens correction profiles. These profiles can automatically correct barrel and pincushion distortion by analyzing your lens’ specific characteristics. If your camera or lens isn’t listed, you can manually adjust the distortion using sliders.
2. Manual Adjustment Tools
If the automatic lens correction tools don’t fully correct the distortion, you can use manual adjustment tools to fine-tune the image. These tools allow you to adjust the horizontal and vertical distortion, correcting any curvature in the lines of your photo.
3. Crop Your Images
If distortion is more noticeable at the edges of the image, you can crop the photo to eliminate the distorted areas. While this won’t eliminate the distortion, it can reduce its visibility by focusing on the undistorted center portion of the image.
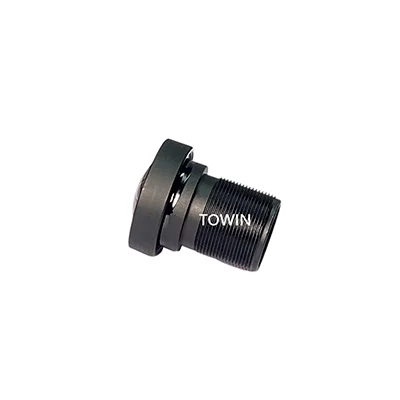
Low distortion CCTV 25mm F2.5 M12 lens
Best Practices for Avoiding Lens Distortion
1. Keep Your Subject Centered
Lens distortion tends to be more pronounced at the edges of the frame. To minimize its impact, try to keep your subjects centered in the frame. This will help reduce the appearance of distortion at the edges of the image.
2. Shoot in the Right Environment
Photographing in controlled environments, such as studios with artificial lighting, can help minimize distortion. Outdoor shoots with natural light may introduce various variables that could contribute to distortion, like extreme focal lengths or low-quality lenses. Always evaluate your environment before shooting.
3. Use Software for Real-Time Correction
Some cameras come with built-in lens correction software that can reduce distortion as you shoot. If your camera has this feature, be sure to enable it to ensure minimal lens distortion in your final images.
FAQs
How do I know if my lens has distortion?
The easiest way to detect lens distortion is to look for curved lines, especially near the edges of your photos. Take test shots of subjects with straight lines, like buildings or grids, and examine them closely.
Does a Low Distortion Lens work for all types of photography?
Yes, a Low Distortion Lens can benefit almost any type of photography, including landscapes, portraits, and architecture. However, the effect might be more noticeable in wide-angle or architectural shots where distortion is more common.
Can lens distortion be fixed in Photoshop?
Yes, lens distortion can be corrected in Photoshop. You can use the “Lens Correction” filter, or adjust the distortion manually using the “Transform” tool to straighten out curved lines.
What is the best lens for avoiding distortion in wide-angle shots?
A Low Distortion Lens in the 24mm to 35mm focal range is typically the best for avoiding distortion in wide-angle shots. These lenses have fewer optical problems and provide clearer images than ultra-wide options.

Low distortion 2mm 110° M7 mount lens
Conclusion
In conclusion, how to minimize lens distortion boils down to a combination of using the right gear, employing effective shooting techniques, and mastering post-processing. By investing in a Low Distortion Lens and following these tips, you’ll be able to enhance the quality of your images, reducing unwanted distortion and capturing the true beauty of your subjects.